Using XnConvert to prepare images for Print
In today’s ecommerce world, it’s very important to have high quality images of your products. Best practices say that you should keep your master photo images in a very high-quality, lossless format (such as TIFF). This means these images need to be altered in resolution and size to best fit their use (web page, mobile device and print). Original Line Art should be stored in a vector format such as EPS, PDF, AI or SVG.
As a general rule, follow these guidelines for optimal resolutions to use with offset printing (150 Lines/Inch) when converted to bitmap and scaled to final size:
| Use | Resolution (pixels/inch) |
|---|---|
| Grayscale or Color image | 300 ppi |
| Line Art | 600 ppi |
Higher LPI printing requires higher resolution images. For more information on terms used to define resolution, see this discussion.
We recommend XnConvert to prepare your images for use by AcePrint. It is has a GUI interface, runs on multiple operating systems and handles all the conversions you are likely to require. This program is freeware, but we recommend sending a donation if used for production.
In this tutorial, we will use XnConvert’s “Automatic Crop”, ability to change color depth (to grayscale), set the DPI and image size and output in different jpeg quality levels.
-
Download the XnConvert installer from their website to your desktop.
-
Install and run the program. It should look like the following.
The tabs across the top are used to make settings before you press the “Convert” button.
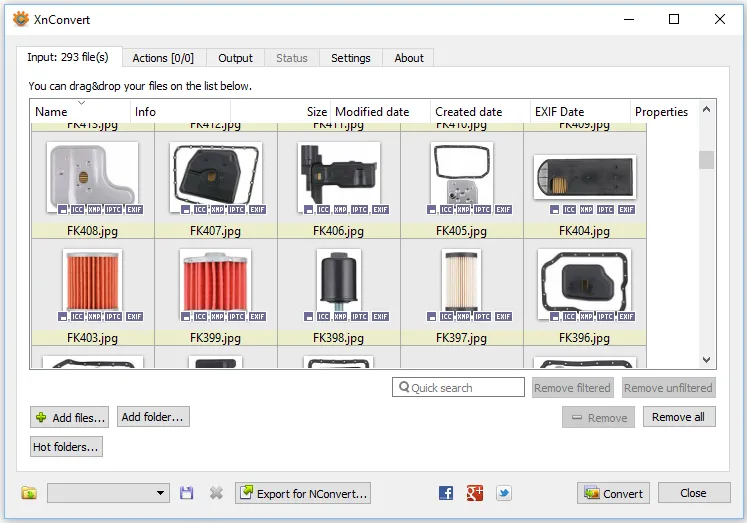
- From the Input tab, press the “Add folder…” (or Add files.. if you don’t want all the files processed) to indicate which files you want converted. Note that these should be your high-resolution, master images.
Now we want to set up some “Actions” to control the conversions.
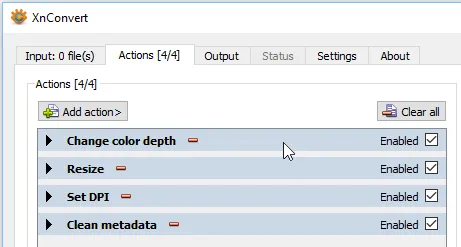
- Press the Actions tab. We want to set up four separate Actions: “Change color depth”, “Resize”, “Set DPI” and “Clean metadata”. These are all found under the Add action > Image menu.
Note that you can drag and drop Actions to set the order they are applied (at the cursor as shown below). Order is important. The minus sign will remove an action.
-
Change color depth. This action can be used to output grayscale.
-
Resize. This action can be used to shrink the image if too big. You generally want to make the image size the same as the print size. (It is easiest to change the units to inches). Always “Keep Ratio”.
-
Set DPI. This action can be used to shrink resolution. Use the above chart as a guide.
-
Clean metadata. This is an optional action used to make the image size smaller. There may be copyright reasons to keep some of this with the images, however.
-
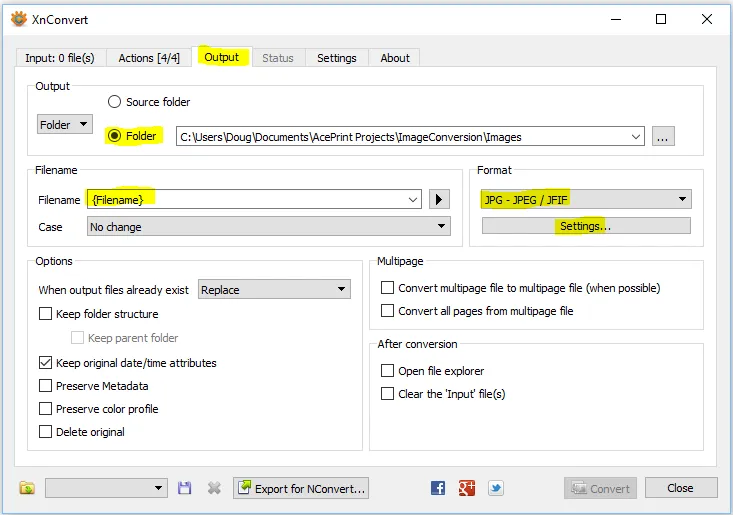
Press the Output tab. By default, the program puts the results in the same folder as the source and appends the word “_result” on the file name. We want to change that as well as indicate that we want JPEG files with a 75% quality.