Footnotes
AcePrint makes it very easy to create footnotes that are repeated on a page (with standard book style footnotes, you’d have a separate footnote “reference” for each use). But it is very common in commercial catalogs to have one footnote referenced many times.
This tutorial shows how to use footnotes in AcePrint.
-
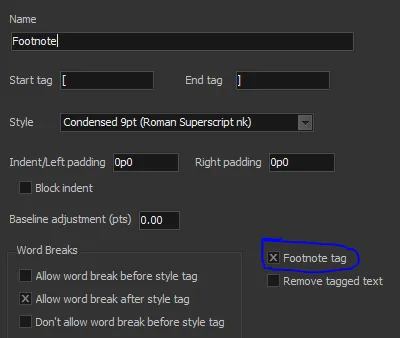
Surround the footnotes in the source data with a Style Tag. We like to use […]. (e.g. [42])
-
Create a “Style” for the footnote using either AcePrintDingbats or the CombiNumeralsPro font. (See the user manual for more info about these fonts and different looks). If you don’t want fancy enclosed numbers, just use a superscript style. If you need symbols, find a font with the symbols you want (Wingdings, Symbol, etc.).
-
In the section’s spanning table, create a “Style Tag” called “Footnote” (or whatever) and include the delimiters you used in the source data, and Indicate that the style is a “Footnote tag”. For example:
If you need symbols, use a substitution as explained in the manual. Remember to check the “Footnote tag” option in any case. Here is one we did with a custom font we made called “Boxed Characters”:
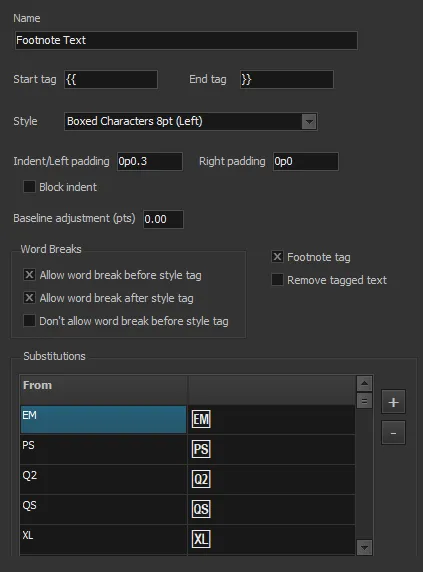
Note that we used a different tag for these. So you could have both [42] and {{EM}} in the source file and both would become footnotes.
At this point, if you created the PDF, you would (presumably) have a nice table with the footnotes styled in the table the way you want. AcePrint finds these Style Tags and keeps track of all the footnotes used on the page. Now we need to have a way to show the actual footnote text (and reference) at the bottom of the page somewhere. Let’s start by making a file to hold them.
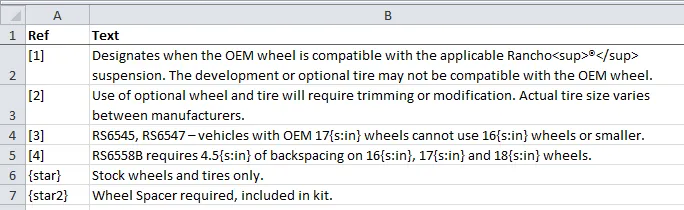
- Create a “Footnotes_Master.xlsx” spreadsheet (or whatever) in Excel to create and maintain the footnote text that will be displayed at the bottom of the page. Include two columns (e.g. “Ref”, “Text”). Note that you don’t need to use the same style tags as in the source, but it is less confusing if you do (and you can then just copy the Style Tags from the main table to the footnote table).
Save this file as CSV and put it in the “Data” directory (where you have all your source data files used by AcePrint for that catalog).
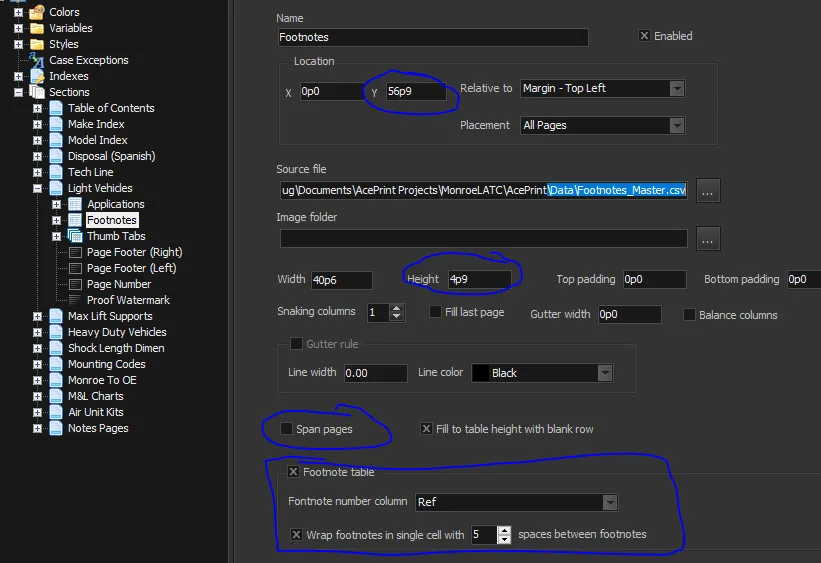
- Create a new non-spanning Table after the spanning Table in the section called, for example, “Footnotes”. Set the “Y” position so it starts right below the main spanning-table and the Height to the end of the printable area on the page (3pts is a good amount). Check “Footnote table” and fill in as below.
Here is an example of what would be created at the bottom of the page (from the Footnote table):

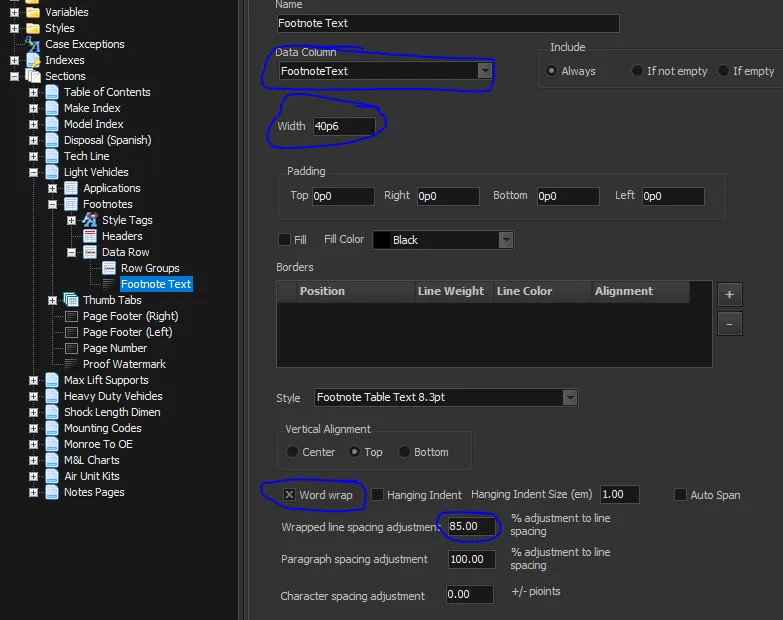
Make sure the text is “Word Wrap” and you might also want to squeeze the line spacing as we have done here (85% is pretty tight, though). Note this example shows a text data cell with “FootnoteText”, but we said to name the column “Text” so it would be that instead.
- Copy/Paste the “Style Tags” you created for the footnote styling from the main table to the Style tags of the footnote table. (You should probably uncheck the “Footnote tag” option on them, but it will work even if you keep it.)