Static Page Header & Footer
Now that you see how easy it is to place static text on a page, let’s take the next step and create a page header and footer. This is a similar concept to “Master Pages” in the Desktop Publishing world. That is, any static text you place on the page will be placed on every page (unless otherwise limited by “Placement” or “Conditions”).
-
File > New. To create a new catalog.
-
Click on “Sections” and Right-Click to Add a Section. This will create an empty section.
-
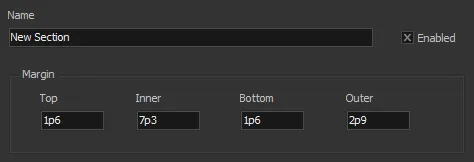
Enter Margin values (1p6, 7p3, 1p6, 2p9). This will let us see the difference between left and right pages more easily.
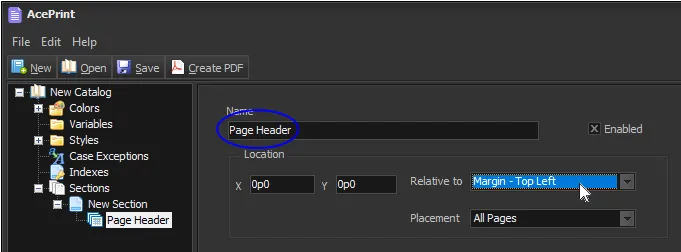
- Click on “New Section”, Right-Click and select Add > Layer Group. This creates a special container which allows you to organize and move static elements together. Change the Name to “Page Header” and select “Margin - Top Left” from the “Relative to” drop-down.
- Click on “Page Header”, Right-Click and select Add > TextBox. This will create a text box element were we enter the static header. Change the Name to “Applications”, Select “Layer Group - Top Left” from the Relative to drop-down list (it is at the bottom of the list), Enter “APPLICATIONS” in the Text box, set the Style as “Default”, Width of “41p0”, Height of “3p0” and “Top” alignment.
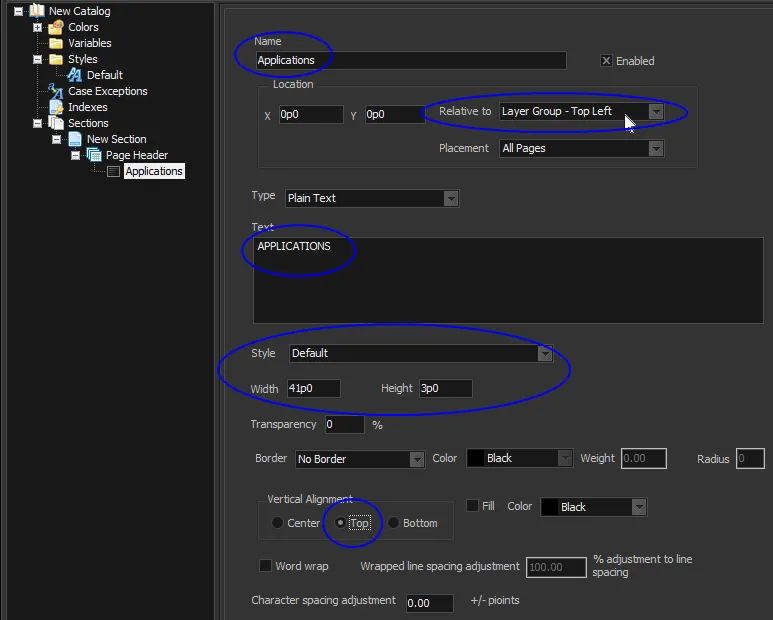
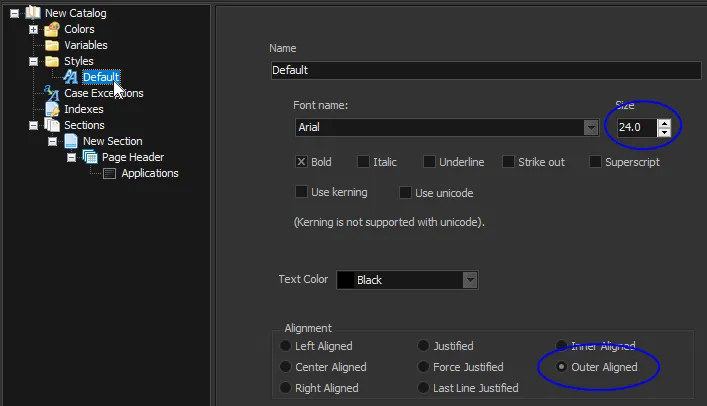
- Select the “Default” style under the “Styles” container in the tree (on the left). Change the font Size to 24 (points), Bold and select the “Outer Aligned” Alignment.
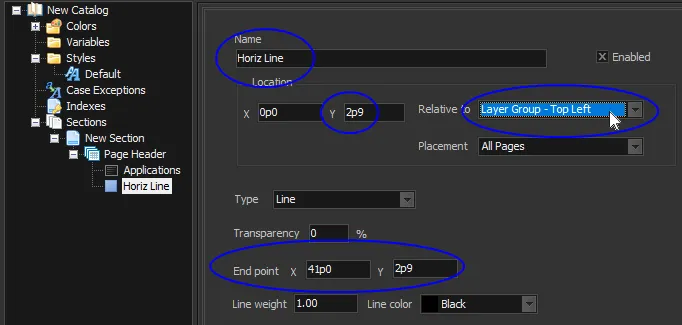
We now have a heading that will change position depending on which side it is on (i.e. it will always be on the outer edge of the book). Next, we want to add a line underneath it. For that, we use a Line/Shape.
- Select “Page Header”, Right-Click and select Add > Line/Shape. This will add a Line/Shape element to the layer group. Change the Name to “Horiz Line”, the starting Location Y to “2p9”, Relative to “Layer Group - Top Left”, End point X “41p0” and Y “2p9”.
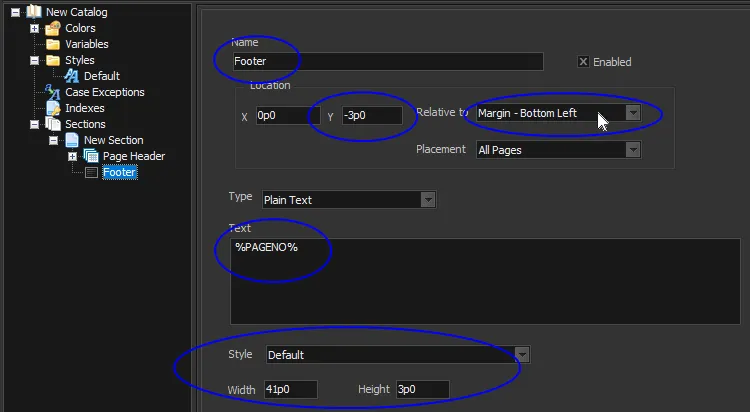
Finally, let’s put a page number (folio) at the bottom of the page. This can be done with a simple Textbox relative to the bottom of the page. But one trick is that we use a built-in system variable for the current page number.
- Select “New Section”, Right-Click and select Add > TextBox. Change the Name to “Footer”, the starting “Y” Location to “-3p0”, the Relative to “Margin - Bottom Left”, Enter “%PAGENO%” in the Text box and set the “Default” Style, with a “41p0” Width and “3p0” Height. Notice that we used a negative Y position because we were moving UP the page (relative to the Bottom Margin).
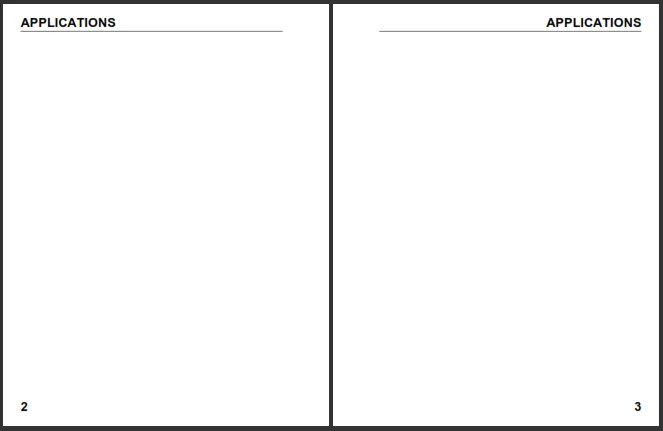
Which will now generate a two page spread like the following (here we forced a second page and changed the starting page number to show a left/right spread, but a table running multiple pages would have the same effect):