Report Definition
When you select Reports > Pivot Report from the main menu, the Pivot Report Definition screen is
displayed. You can start entering a new report definition or use the File > Open… menu to open an
existing one stored anywhere on your file system. All report definitions have a .pdef extension.
Just as you would with a word processing program, if you make changes to a definition you can save it under a new name using File > Save As. Since they are just files, you can also copy and rename them with normal file system tools.
The screen is divided into two sections: settings that apply to the entire report on the top, and the part columns grid on the bottom (one row per part column).
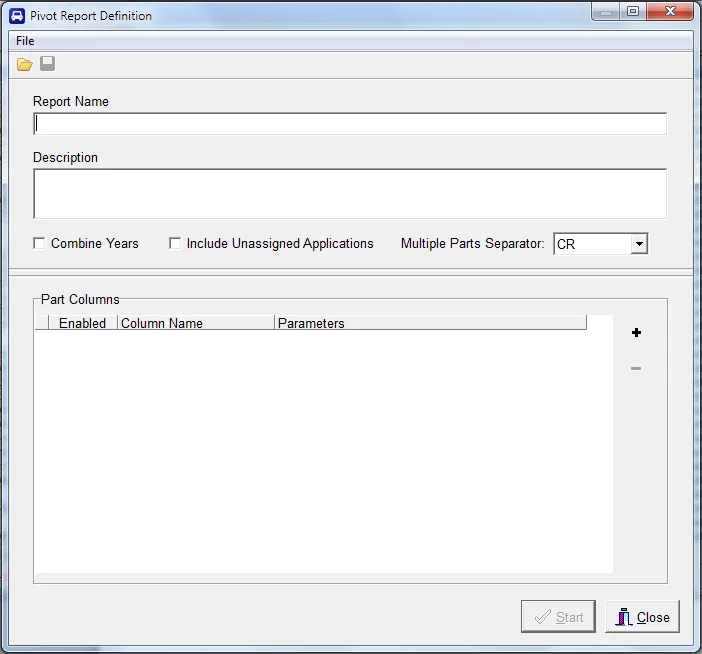
Report Name
This field can be anything that helps you identify the report and could be thought of as the title of the report. When a new file is being saved, the file name defaults to this Report Name (but can be overridden).
Include Unassigned Applications
This check box determines whether to include an extra part column to catch any applications that are not assigned to one of the defined part columns. This part column is always called Catch-All and placed at the end of the row. It is a good idea to use this option when developing a new report so you can confirm you are not dropping applications you wanted to keep. The report also always reports the count of unassigned applications, regardless of this setting.
Multiple Parts Separator
Select from the drop-down options. The default is a linefeed (LF). The selected character is used to separate
part numbers when more than one part is assigned to the same cell. A linefeed works well with .csv files,
putting each part on its own line within the cell. The “comma” and “semicolon” options also append a space
after the separator to make them read better.
Part Columns Grid
Part column definitions are maintained one per row in the bottom grid.
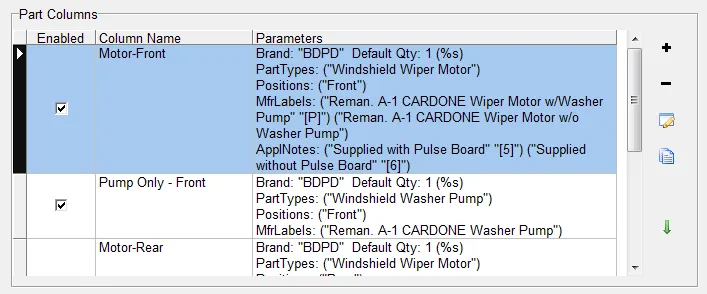
Use the buttons above the grid to manage rows:
- Plus (+) — add a new part column.
- Minus (−) — delete the selected part column.
- Pencil — edit the selected part column (or double-click the row).
- Copy — append a copy of the selected part column as a new row at the end.
The grid has three columns:
- Enabled — whether the part column will be populated.
- Column Name — the heading used for that column in the report.
- Parameters — a summary of all the settings for that part column.
The green up and down arrows change the order of the columns. Order is significant because part columns are emitted left-to-right after the Stub columns in the order defined here.
See Part Column Editor for the dialog that opens when you Add or Edit a part column.