Test Database
If you would like to follow along in an actual database, backup the PIESCentral database and restore using a different name.
You can easily switch between databases using Administration | Change Database. After prompting, PIESCentral will close. When you restart PIESCentral, you will get a login screen allowing you to choose a database.
You can also download the test data used in this tutorial here TutorialData.xls
PIES Specification
You will probably find it useful to have a copy of the PIES Specification for reference. Get the PIES 7.2 Version. It can be downloaded from:
https://digital.autocare.org/pies/
Download the Aftermarket Brand Code Table from this location:
https://digital.autocare.org/data-standards-documentation/
General Setup
The first step is to create a company record for your products and load the Auto Care brands you will be using.
1. Set up Your Company (Maintain | Companies)
Both Senders and Receivers must be set up within the system. Normally, you will define just one Sender representing your company. You might have several “Receivers” of the data, however.
A list of all these Companies is displayed in a grid with the ability to Add, Edit or Delete them. The Add/Edit screen looks like this:
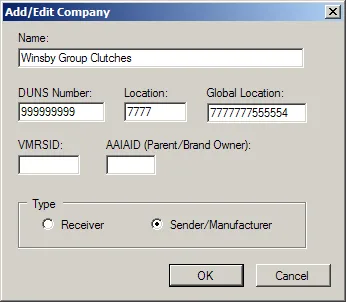
You need to supply either a DUNS Number + Location or a Global Location (also known as the GLN). VMRSID is optional.
Find your BrandID from the Auto Care Brand Table. It should be a four-character code representing the “Brand Owner” level. (You can also add a separate “Parent” Entry in the grid, although the value of this information is debated in the industry because it changes so frequently).
Next, Add a row in the company grid representing a data Receiver (data partner). Give it a name like “Distributor1” and leave all other identification fields blank (they are optional).
2. Setup Auto Care Brands (Maintain | AAIA Brand)
Use the Brand table downloaded from https://digital.autocare.org/brand-table/ to find your product brands and your competitor brands.
It is usually a good idea to download the entire file, but edit it to include only the brand codes you are interested in. (There are over 4500 brands defined in the file, many of which would just slow down your searches and make very long selection lists).
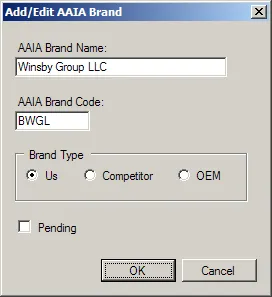
Select Maintain | AAIA Brands… and then select the Brands… button in the Import frame on the right side of the screen. It will display a standard Open Dialog. Select the (edited) text file version of the table, and the new brand codes should display in the grid.
By default, all Brand Types are set to “Competitor”. Find your brands and change them to the “Us” Brand Type.
3. Setup PIESCentral Primary Brand (Maintain | Our Brands)
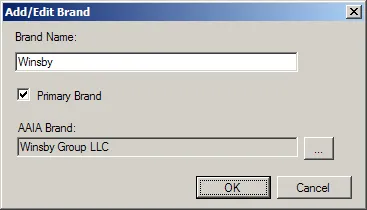
At the empty grid, press the Add button to create a primary brand for your company. When you choose the Auto Care Brand (using the ellipsis button […]), search by name to find your Auto Care Brand name. The screen should then look something like this. Press the OK button to save the Primary Brand.
4. Setup Import Sources (Import | Sources…)
PIESCentral can access many different data source types including AS/400, Oracle, DB2, SQL Server, etc. To keep things simple for this tutorial, we use an Excel spreadsheet (with several tabs) as our only data source.
(We defined “Named Ranges” in this sample spreadsheet to allow more than one “table” per sheet, but generally, you would include just one table per worksheet.)
Use the Add/Edit Import Source dialog to define an Excel Source Type pointing to the “TutorialDemo.xls” file. Enter “Tutorial Data” in the Source Name field. Select “MS Excel” as the Source Type. Click the “Value” column next to “Filename” to bring up the standard Open Dialog. Remember to change the “Files of Type” drop down to limit files to MS Excel (xls) extensions.
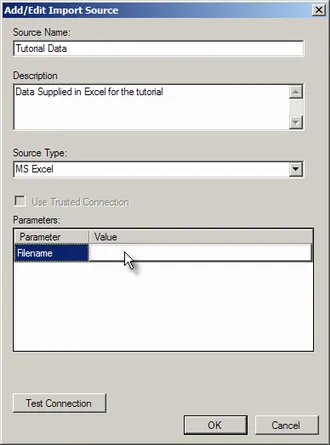
If you create a source that requires a password, you will be prompted to enter a password that will serve as a “master password” for all of your sources with passwords. The original password for the source will be encrypted before it is stored in the database. You should now have one Source defined on the Maintain Import Sources screen. Press Close.
5. Begin to setup the script (Import | Scripts…)
PIESCentral “Import Scripts” define how PIES information is pulled from your data sources into the PIESCentral repository. You can have any number of scripts, but each script must have only one brand, and you must have at least one script for the primary brand.
In most cases, you will create one script for your primary brand and one script for each of the other brands (i.e. part numbering systems) for which you need a PIES file. The primary brand script is more complete than the other brand scripts. Some PIES data is not brand-specific and so only needs to be imported once for the primary brand.
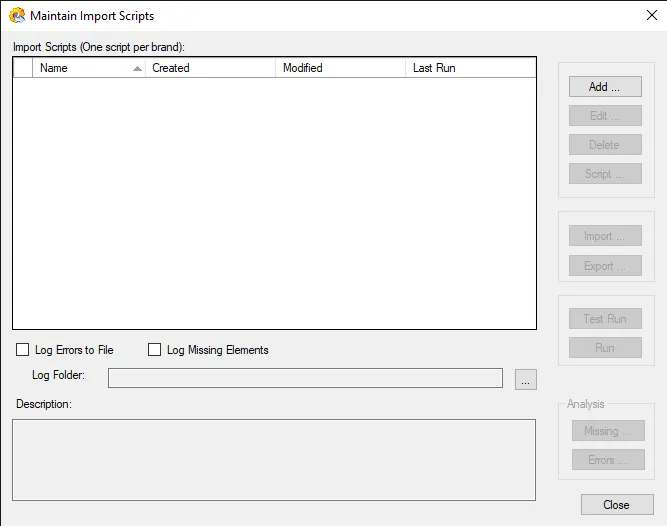
On the Maintain Import Scripts screen, click Add to create a new import script and fill in the Name and Description as shown below:
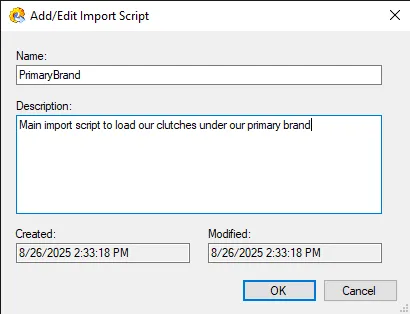
Press OK to save this entry in the grid (which then allows you to complete the script instructions). Press the Edit button to change the Name or Description for the selected entry in the grid.
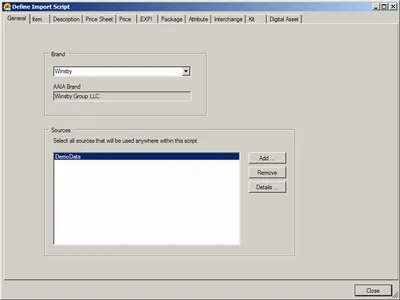
Now you can press Script… to begin creating the actual script instructions. The first tab (General) is displayed and shown below. All of the data sources used by the script must be identified on the General tab. Select your Brand from the drop-down. The Auto Care Brand is automatically displayed. Press the Add button to select the Tutorial Data source you defined above.
6. Define the Item segment data.
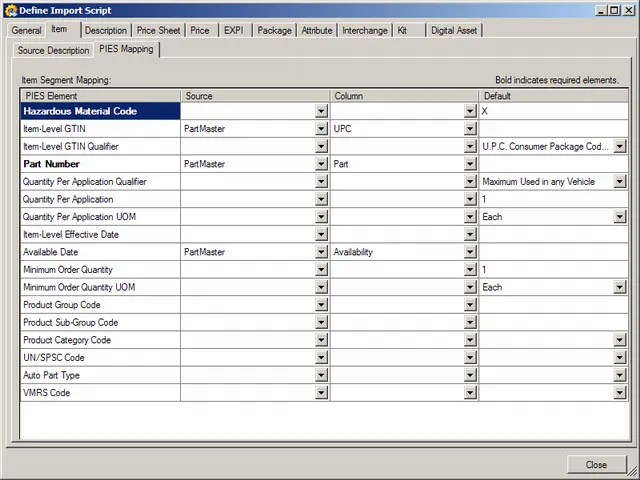
Under the Item tab, select the PIES Mapping tab to see which PIES elements apply to the Item segment. Bold elements are required (or recommended). Other elements are optional, but may be required by specific trading partners. For the Item segment, the only required elements are Part Number and Hazardous Material Code, which should be set to “X” when no hazardous material information is available.
Under the Item tab, select the Source Description tab. You can include any number of sources for each segment. A source in this case corresponds to a single table or query result. One source in each segment is designated as the “master source.” The load process will look at each row in the master source and lookup information in the other sources that are joined to the master source. Rows in any non-master sources that do not link up with the master source are skipped, so it is very important that the master source contain a complete set of rows. The joins between the master and non-master sources are similar in behavior to an outer join in SQL.
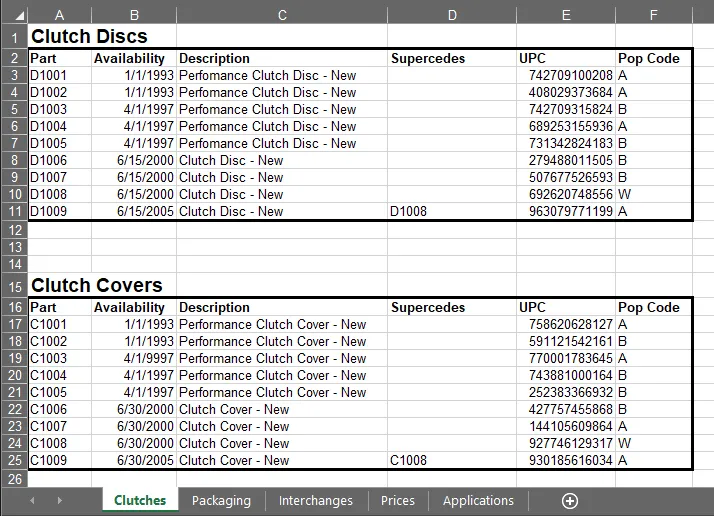
For the item segment, the master source will be a query combining two named ranges in the TutorialData spreadsheet. Give the Source Specification an Alias Name (for example, “PartMaster”) and select “Tutorial Data” as an SQL Source (because we will be combining the two tables using and SQL Expression).
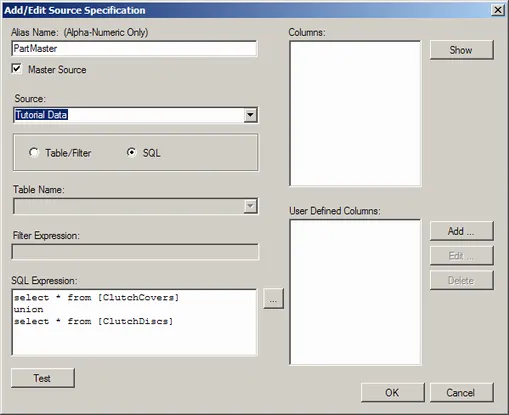
Here’s the query so you can copy and past it into the “SQL Expression” (through the ”…” Button):
select * from [ClutchCovers]
union
select * from [ClutchDiscs]
Excel Note: Since the query is reading from a Named Range, you simply include that name in the brackets. If, however, you were reading from a worksheet, you would use the syntax [SheetName$]. See Defining Data Tables in a Spreadsheet for more information.
You can press the Show button to display the columns returned from the query. No User Defined columns are necessary here. Press the OK button to return to the Define Import Script screen (Source Description) tab.
The View button will display the results of the query in a grid for your review.
Go back to the PIES Mapping tab and fill in the Source, Column and Default data as shown below.
To remove a Source or Column item that has already been selected (possibly by mistake), select the box and then click it a second time to show the in-line edit box. Press the Delete key on the keyboard to clear the edit box.
You could at this point run the script and load the part numbers and availability date. You could even generate a valid (but very incomplete PIES file). But instead, let’s work on the Description segment tab.
7. Define Description segment data
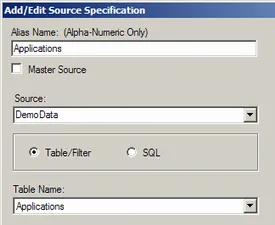
The TutorialData spreadsheet contains Vehicle Application Summary data on a separate tab (identified by a named range called “Applications”). In this section we will define two data sources (a Master source for part numbers and a source for Application data) and join them together by part number.
Select the Description Tab and add a PartMaster data source just as we did above. The second data source is very simple because we can just use the entire table (by selecting the Table/Filter option and the “Applications” table from the Table Name drop-down). Here is a piece of that screen to show the relevant selections.
8. Join Two Data Sources.
Once you have created the two data source specifications, you must tell the system how to join them. This is done on the Joins grid at the bottom of the Source Description tab. Press the Add button and fill the Join screen out like this:
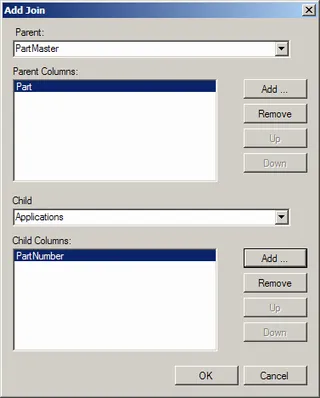
Press the OK button to keep the Join definition. If you need to make a change to an existing Join, you must remove it and add a new one.
9. Switch to the PIES Mapping tab and Map the Description Segment fields.
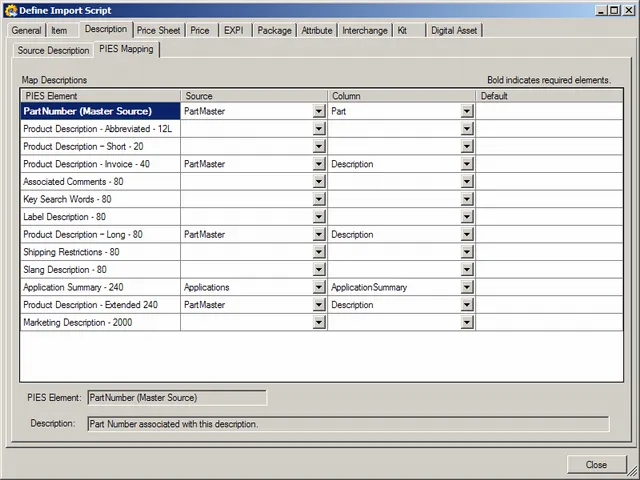
Notice that we are pulling data from two sources (PartMaster and Applications) for this segment. Be sure to select the correct one from the Source drop down.
You’ve now completed enough mapping to create a reasonable PIES output file for the Item and Description segments. Before we publish, though, we must run the import script to pull data into the repository. Press the Close button to return to the Maintain Import Scripts screen.
10. Test the script.
From the Maintain Import Scripts screen, select the Clutches script and click Test Run. This will check for any problems that would prevent loading of valid PIES data. (“Test Run” checks the PIES Data against the PIES Specification rules. “Run” Checks the PIES Data and imports it into the PIESCentral repository.)
The test should show no errors. Press OK. Press No to the “Show Missing Elements” question (we will cover that feature later).
11. Run the script.
Press the Run button. This will load the elements mapped so far into the repository.
12. Setup a PIES Document (Publish | Documents)
PIESCentral “Documents” are used to define what information should be output for your data partners. It can be thought of as a “template” which can be used by one or more of your data recipients. Press Add… from the Maintain Documents screen.
a. On the General tab, enter a document name, select the first check box in the list under Auto Care Brands and your primary brand in the Brand drop-down. Select English for the Language and US Dollars for the currency (although this won’t matter, because we don’t have prices yet). Don’t limit by product group.
b. On the Header tab, select the Parent and Manufacturer. Select English for the Default Language and US Dollars for the Default Currency. There are no Price Sheets to select.
c. On the Item and Description tabs, select which optional elements you want to include. You can leave everything checked, but the elements that have not been loaded won’t appear in the PIES file.
d. Go to each of the other tabs. Where there is a checkbox to include the segment, uncheck. There is no data available for the other segments.
e. Press OK to finish.
13. Create a publication (Publish | Publications)
A “Publication” is used to define which documents are sent to which data partners. If none of the requirements change, the same publication can be sent periodically to update your data partner’s files. A history of these transmissions are automatically stored. From the Maintain Publishing screen, press the Add… button.
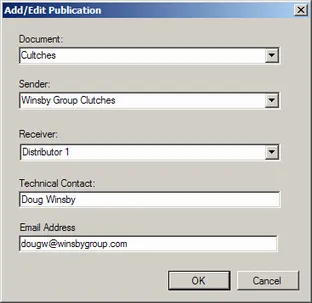
Select the Document (template), the Sender (you), and the Receiver from the drop-down lists. Enter your technical contact information to be included in the PIES file Header. Press OK.
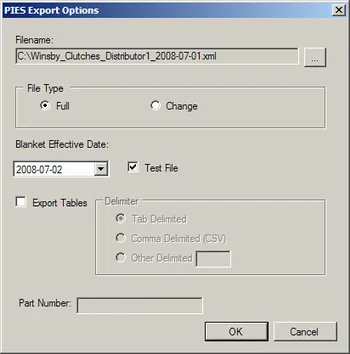
14. Export the PIES xml file.
From the Maintain Publishing screen, press the Publish… button. Enter a descriptive filename using the Save As Dialog. (We recommend Sender_ProductLine_Receiver_Date). The first time you publish a Publication, it will always be a “Full” File Type. In subsequent publish operations, you can select either Full or Net Changes (“Change”). Check the “Test File” option to indicate to the data receiver that this is a test.
15. You should now have a valid PIES xml file with just an item segment.
You can open the file in notepad, IE or in a tool such as XmlSpy. But a better way to view a PIES file is with PIES Assistant. PIES Assistant is a separate program that is included with PIESCentral Enterprise. You can get a trial version of PIES Assistant here.
https://winsbygroup.com/piesassistant.html
Download the trial and use the registration code provided separately to activate. Once you install PIES Assistant, it will appear on the Tools menu of PIESCentral.
A PIES Import Script can be built incrementally as you identity sources. You can always return to the script and add more segments or more fields as needed.